10 Best Cleaning Kits for Sensors
The scent of damp, mineral-rich earth after a heavy rain indicates a high Cation Exchange Capacity (CEC) within the soil. This smell, known as petrichor, signals the release of geosmin by actinomycetes as they break down organic matter into bioavailable nutrients. A healthy leaf exhibits high turgor pressure; its cellular walls are rigid and distended by internal fluid. In the world of high-precision botanical monitoring, clarity is everything. Maintaining your digital diagnostic tools is as critical as sharpening a spade. Finding the best cleaning kits for sensors ensures that your moisture probes and light meters provide accurate data rather than distorted readings caused by salt buildup or debris. Without clean optics and electrodes, your data on photoperiod and transpiration rates becomes useless. Precision in the field requires precision in maintenance. A single fingerprint on a sensor lens can skew light intensity readings by 15 percent; this leads to incorrect adjustments in supplemental lighting and potential plant senescence. Clean equipment is the backbone of a data-driven rhizosphere.
Materials:
The ideal substrate for most high-yield cultivars is a friable loam with a **pH range of 6.2 to 6.8**. This acidity level ensures that micronutrients like iron and manganese remain soluble. For vegetative growth, select a fertilizer with an **NPK ratio of 3-1-2**. This high nitrogen concentration supports chlorophyll production and leaf expansion. During the reproductive phase, transition to a **1-3-2 ratio** to prioritize phosphorus for flower and fruit development. The physical texture of the soil must allow for 20 percent air porosity to prevent root hypoxia. If the soil is too dense, incorporate perlite or coarse sand to increase the drainage rate. A high-quality substrate should have a CEC of at least **15 to 25 milliequivalents per 100 grams** to effectively hold onto positively charged ions like potassium (K+) and magnesium (Mg2+).
Timing:
Success depends on adhering to the specific frost-date windows of your USDA Hardiness Zone. In Zone 7, the last spring frost typically occurs in mid-April; however, soil temperature is a more reliable metric than the calendar. Do not transplant until the soil consistently reaches 60 degrees Fahrenheit at a depth of 4 inches. The biological clock of the plant is governed by the photoperiod. As day length shifts, the plant transitions from the vegetative stage (focusing on biomass) to the reproductive stage (focusing on seed production). This shift is triggered by the protein phytochrome, which senses the ratio of red to far-red light. For short-day plants, this transition occurs when the period of uninterrupted darkness exceeds 12 hours.
Phases:

Sowing
Place seeds at a depth equal to twice their diameter. Maintain a consistent moisture level to ensure the seed coat softens and allows the radicle to emerge. Keep the ambient temperature between 70 and 75 degrees Fahrenheit for optimal germination rates.
Pro-Tip: Ensure seeds have adequate contact with the substrate to facilitate imbibition. This is the biological process where the seed absorbs water to activate enzymes; without this, the embryo remains dormant.
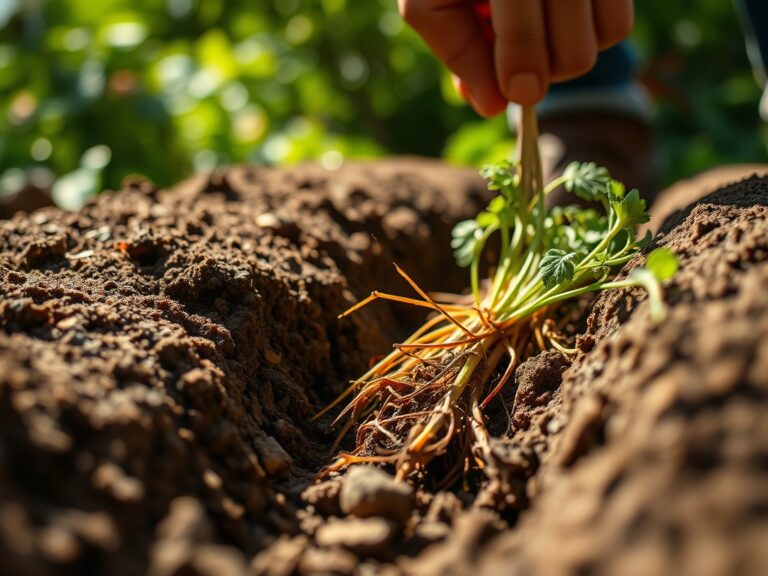
Transplanting
When the first set of true leaves appears, the seedling is ready for relocation. Dig a hole twice as wide as the root ball using a hori-hori knife. Place the plant so the crown sits level with the soil surface. Water immediately with a diluted seaweed extract to reduce transplant shock.
Pro-Tip: Avoid disturbing the rhizosphere during this move. Maintaining the integrity of the root hairs is vital because they are the primary site for water uptake and mycorrhizal symbiosis; this fungal partnership extends the root system's reach for phosphorus.
Establishing
During the first 14 to 21 days, the plant focuses on root architecture rather than upward growth. Monitor the soil moisture daily using a soil moisture meter. The plant requires stable environmental conditions to build the vascular tissue (xylem and phloem) necessary for transporting water and sugars.
Pro-Tip: Use a light mulch to suppress weed competition and regulate soil temperature. This prevents auxin suppression; auxins are hormones that move downward from the apical meristem to promote root initiation.
The Clinic:
Symptom: Interveinal Chlorosis
This appears as yellowing between the leaf veins while the veins themselves remain dark green.
Solution: This is a classic sign of Magnesium deficiency.
Fix-It: Apply a foliar spray of Epsom salts (magnesium sulfate) at a rate of 1 tablespoon per gallon of water. Ensure the soil pH is not below 5.5, as acidity locks out magnesium.
Symptom: Blossom End Rot
The bottom of the fruit develops a dark, sunken, leathery spot.
Solution: This is caused by a Calcium deficiency, often triggered by inconsistent watering.
Fix-It: Maintain consistent soil moisture to ensure calcium ions can travel through the xylem. Add lime or gypsum to the soil if the calcium-to-magnesium ratio is imbalanced.
Symptom: Nitrogen Chlorosis
The oldest leaves at the bottom of the plant turn uniformly pale yellow and eventually drop off.
Solution: The plant is mobile-nutrient deficient and is scavenging nitrogen from old growth to support new leaves.
Fix-It: Side-dress with a high-nitrogen organic meal or a 20-20-20 water-soluble fertilizer to quickly restore nitrogen levels.
Maintenance:
Precision maintenance prevents physiological stress. Deliver exactly 1.5 inches of water per week at the drip line. Use a soil moisture meter to verify that the water is penetrating at least 6 inches deep. For woody perennials, use bypass pruners to make clean, 45-degree cuts just above a lateral bud; this encourages outward growth and prevents water from pooling on the wound. Regularly calibrate your digital tools. Using the best cleaning kits for sensors ensures that your pH probes do not drift, which could lead to "nutrient lockout" where the plant cannot absorb minerals despite their presence in the soil. Sanitize your hori-hori knife with a 10 percent bleach solution between plants to prevent the spread of soil-borne pathogens.
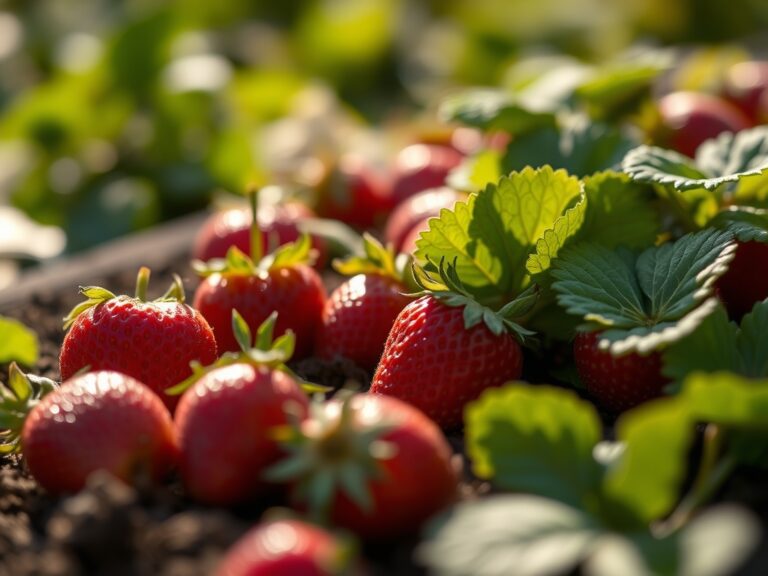
The Yield:
Harvesting is a matter of cellular timing. For leafy greens, harvest in the early morning when turgor pressure is at its peak; this ensures the leaves are crisp rather than wilted. For fruiting bodies, wait until the fruit detaches easily from the pedicel with a slight tug. Post-harvest, immediately lower the temperature of the produce to 40 degrees Fahrenheit to slow down the rate of respiration. This "field cooling" preserves the sugars and prevents the rapid breakdown of cellular structures. Handling the plant with care during this stage ensures "day-one" freshness by minimizing bruising, which would otherwise trigger the release of ethylene gas and accelerate decay.
FAQ:
How do I fix yellow leaves?
Yellowing, or chlorosis, usually indicates a nitrogen deficiency or a pH imbalance. Check the soil pH first; if it is within the 6.2 to 6.8 range, apply a nitrogen-rich fertilizer to restore green pigment and support photosynthesis.
When should I water my garden?
Water in the early morning to minimize evaporation and allow foliage to dry before nightfall. Aim for 1 to 1.5 inches per week. Use a soil moisture meter to ensure the root zone remains hydrated but not anaerobic.
Why are my plants wilting despite wet soil?
This is often a sign of root rot or hypoxia. When soil is oversaturated, roots cannot access oxygen, leading to cellular collapse. Improve drainage by adding organic matter or perlite to increase the soil air porosity.
How often should I calibrate my sensors?
Calibrate digital pH and moisture sensors every 30 days or whenever you notice inconsistent readings. Use the best cleaning kits for sensors to remove mineral deposits from the probes, ensuring the Cation Exchange data remains accurate.